Wednesday, January 20, 2010
Energy Raising
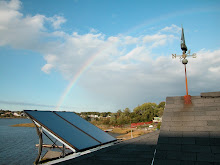
There is a new initiative floating around the solar industry called "energy raising." The concept is based on the well-known barn raisings utilized by the Amish. Many hands make for light work. The solar version uses the same idea of neighbors helping neighbors, but instead of raising a barn, a solar thermal hot water system is "raised." Volunteers split into groups to assist in installing the evacuated tubes and rack, the piping and other components. The host of the energy raising pays it forward by helping out on other installations. Participating in an energy raising is a great way to lower the cost of a solar thermal installation. Some professional help will be required in regards to connecting the water tank to the plumbing and electrical systems. A group in Plymouth, NH has pioneered the energy raising concept, but there are other groups that have followed suit. I am a proud contributor to the energy raising efforts of the DFA Task Force for Energy, Environment and Sustainability in Gettysburg.

Wednesday, January 13, 2010
Efficient Seed Propagation Lights
My wife operates a small Certified Naturally Grown farm. She calls me her "farm hand." I guess the title fits as my responsibilities include those similar to what a farm hand would do; rototilling, bark chipping, fetching compost and building hoop houses and cold frames. Since I don't get paid for my services (other that by delicious "locally grown" veggies) I need a title. I don't care too much for the title she gave me, so I am to be known as the self-anointed Director of Energy Consciousness. She has decided to implement lighting for seed propagation. I am leery of using the term "grow lights" in fear of ending up on some DEA watch list, but that is what they are. After much research on lighting of this sort, I have determined that a mix of T5, T8 and T12 fluorescent lights will serve her best. The factors I considered most important were lumens per watt, cost and availability and environmental impact. T5 lights give off more light per watt and are more environmentally conscious in regards to mercury, but they are expensive and not available locally and would have to be ordered. Fortunately, she has a 2' T5 "sunlight" lamp which I modified to be used for her intended purpose. Since we have some older 4' T12 lights, I felt is was best to modify them with reflectors and mount them over a growing table. Their light output per watt is considerably lower than the newer T5's and T8's, but I felt it was best to use them until the end of their lives to avoid prematurely having to contend with the associated mercury issues, plus there was no expense involved. The remaining lights in the growing system are T8 lights. The light output per watt is close to the T5's and are readily available at the local home improvement center. I bought some Energy Star rated 4' T8 fluorescent shop lights with hanging chains and a power cord for less than $10 each. The 32 watt bulbs produce 20,000 lumens. I mixed some 5,000K "sunlight" bulbs with some 6,500K "daylight" bulbs to average the 5,500K needed for optimum growing with a suitable blend of light in the blue and red ranges. Now I just have to build a growing rack to hold the new lights. Oh wait, that is something a farm hand does...
Wednesday, July 15, 2009
Rain Barrels
Rain barrels are a simple and effective way to use rain runoff from your roof to irrigate your gardens and flower beds. The advantages are three-fold. You lessen the amount of runoff which decreases pollution and erosion, you conserve water by decreasing your water usage for outdoor purposes, and you reuse the barrel thereby negating it being disposed of or going through the recycling process. There are many styles of rain barrels available, but the concept is the same, divert the water running down your gutter downspout into a barrel for later use. Your rain barrel should have an overflow pipe which can be directed to where the downspout previously drained, or into another rain barrel. Some rain barrels have an old-fashioned pitcher pump mounted to the top to draw off water while others simply have a hose bib attached to the bottom of the barrel to draw off water. If using the type with the hose bib, I recommend setting the rain barrel op on concrete blocks. This will make it easier to get to the hose bib and also provide a little elevation for pressure if running a hose directly from the barrel to your garden. You can buy 55 gallon plastic barrels from a food service vendor for $5-$10, or you can order an oak barrel with an iron base for $275 online. The food service barrels are usually bright blue, but can be painted to match your house. I installed a rain barrel on my house recently and it took less than 15 minutes. It quickly filled during the following rain storm, so I need to get a few more. Surely, it is time to "roll out the barrel." It is, and don't call me Shirley.
Monday, May 11, 2009
Weather Responsive Heating Controls
There has been a lot of recent interest in weather responsive controls for residential heating systems. This is nothing new. I have been installing them since the early 1990's. Basically, it is a control that connects to your heating plant and provides additional control of your system temperature. A weather responsive control has at least two sensors, one to measure outdoor temperature and one to measure your system temperature. More complex controls can have additional sensors for heating zones, individual rooms and domestic hot water.
Your heating system was installed based on what is known as design temperature, or the coldest expected temperature for your area. Heating systems could be considered oversized, since the temperature may only fall that low for a few days of the year, but when it does, your house will stay warm. Also, your heating plant operates like a teenager with a Mustang, either petal to the metal, or slam on the brakes. When there is a call for heat, your heating plant fires and runs up to it's highest setting. When your thermostat is satisfied, it shuts off. This is perfect, if it is the dead of winter and you are at the design temperature, but how often is that? If it isn't that cold out, it makes sense that you don't need as much heat from your system, right?
A weather responsive control does just that. It modulates your system temperature based on the outdoor temperature. When it isn't that cold out it doesn't let your system get too hot. It only lets your system reach a temperature sufficient to heat your home at the current outdoor temperature. A weather responsive control will work with any type of heating system, but it will work best with radiant floors, cast iron radiators, or radiant baseboard.
It looks like Junior just traded in the sports car for a hybrid!
Your heating system was installed based on what is known as design temperature, or the coldest expected temperature for your area. Heating systems could be considered oversized, since the temperature may only fall that low for a few days of the year, but when it does, your house will stay warm. Also, your heating plant operates like a teenager with a Mustang, either petal to the metal, or slam on the brakes. When there is a call for heat, your heating plant fires and runs up to it's highest setting. When your thermostat is satisfied, it shuts off. This is perfect, if it is the dead of winter and you are at the design temperature, but how often is that? If it isn't that cold out, it makes sense that you don't need as much heat from your system, right?
A weather responsive control does just that. It modulates your system temperature based on the outdoor temperature. When it isn't that cold out it doesn't let your system get too hot. It only lets your system reach a temperature sufficient to heat your home at the current outdoor temperature. A weather responsive control will work with any type of heating system, but it will work best with radiant floors, cast iron radiators, or radiant baseboard.
It looks like Junior just traded in the sports car for a hybrid!
Tuesday, April 28, 2009
Reducing the Pollution From Your Lawn
We know that the nitrates and phosphates found in fertilizers cause tremendous pollution. We know that heavy rains wash these substances into streams, lakes, rivers and bays. We know the devastating environmental damage they cause. We also know we are not doing enough to prevent it. Here are four tips to help you reduce your contribution to this problem.
1. Avoid using commercial phosphate/nitrate laden fertilizers on your lawn. Duh. Use organic fertilizers, manure or compost. If you lessen the pollutants in your lawn and garden, there will be less to wash off, and the problem is lessened.
2. Practice erosion control by covering bare soil with mulch or by planting grass or cover crops. Less exposed soil equates to less erosion, and subsequent pollution, by the actions of wind and rain runoff.
3. Use rain barrels on your gutter downspouts to contain water that would normally be allowed to run off and use it for outdoor watering. You will ease the burden on the streams and also conserve water in the process.
4. Install a rain garden. This rainwater containment area holds a vast amount of storm runoff and any pollutants it would be carrying. The natural actions of plants and soil work to offset the pollution. In some areas, it is required by code to install rain gardens to contain the runoff from large commercial parking lots. Installing one for your home would be an inexpensive and beautiful way to go the extra mile in your conservation efforts.
1. Avoid using commercial phosphate/nitrate laden fertilizers on your lawn. Duh. Use organic fertilizers, manure or compost. If you lessen the pollutants in your lawn and garden, there will be less to wash off, and the problem is lessened.
2. Practice erosion control by covering bare soil with mulch or by planting grass or cover crops. Less exposed soil equates to less erosion, and subsequent pollution, by the actions of wind and rain runoff.
3. Use rain barrels on your gutter downspouts to contain water that would normally be allowed to run off and use it for outdoor watering. You will ease the burden on the streams and also conserve water in the process.
4. Install a rain garden. This rainwater containment area holds a vast amount of storm runoff and any pollutants it would be carrying. The natural actions of plants and soil work to offset the pollution. In some areas, it is required by code to install rain gardens to contain the runoff from large commercial parking lots. Installing one for your home would be an inexpensive and beautiful way to go the extra mile in your conservation efforts.
Thursday, April 9, 2009
Geothermal Systems
A geothermal system is basically a heat pump, a type of heating/AC unit common in southern states and hotels. The system transfers heat from where you don't want it to where you do. In the summer, it is an air conditioner. It takes the heat from your house and transfers it outside. In the winter, it is a heater. It takes heat from outdoors and transfers it into your house. Yes, you read that right. Even in the dead of winter, there is plenty of heat to transfer into your house. This is accomplished by increasing and decreasing the pressure of a refrigerant gas in the system by means of a compressor.
The Ideal Gas Law states that if you increase the pressure of a gas, it's temperature will also increase. Consequentially, if you decrease the pressure of a gas, it's temperature will also decrease. Also, if you put a gas under enough pressure, it will turn into a liquid and when you release the pressure, the liquid will turn back into a gas. In the summer, the compressor increases the pressure and temperature of the refrigerant, turns it into a liquid, and sends it to a coil in your duct work. There, the pressure is decreased and the liquid returns to a gas, and the temperature decreases. The coil gets cold and a fan blows the cool air into your house while the refrigerant , which has absorbed heat from your house, returns to the compressor where it dissipates the heat from your house to the air outside via another coil. In the winter, the compressor turns the gas into a liquid, but now it sends it to the outside coil where it turns back into a gas and the temperature decreases. The refrigerant, which is now hot from absorbing heat from outdoors (yes, it really did!,) moves to the coil in your duct work and makes it hot. Your fan blows the warm air into your house.
A geothermal system removes the outside heat transfer coil and replaces it with a coil that is buried deep underground. The ground temperature below 4-5 feet remains relatively constant year round at around 55 degrees. This provides much more efficient heat transfer compared to an above ground coil exposed to constantly changing temperatures. There are some geothermal systems in which the outdoor coils are buried at shallower depths, but use a larger coil to compensate for the warmer ground temperatures. There are other systems that submerge the coil in a pond or an aquifer. Though more difficult to install, they are more efficient as water is such a good conductor of heat. A geothermal system can cut your heating bill 50%-60%, possibly more.
Geothermal misconceptions:
1. You must have duct work in your house for AC. Geothermal AC will not work with any other type of heating system. If you run cold water through baseboard heaters, radiators or radiant heat pipes, you will have condensation on your floors. This would cause wet, slippery floors and water damage to rooms. If you don't have duct work, you can use geothermal for heating only.
2. The heat that goes into your house comes from the compressor, not from the Earth's core. You would have to go down a great depth to reach that heat and if you did, it would be to hot to transfer heat to when you are using AC in the summer. I would also suspect that if you went too deep magma would actually melt the piping!
3. A geothermal system will drastically reduce your fuel cost for the winter, but prepare yourself for a whopper of an electric bill. The spike in your electric bill in the summer when you run your AC will pale in comparison to your winter electric bill. The compressor uses a lot of power and you will be running it all winter long. Do your homework as some compressors are more efficient than others.
The Ideal Gas Law states that if you increase the pressure of a gas, it's temperature will also increase. Consequentially, if you decrease the pressure of a gas, it's temperature will also decrease. Also, if you put a gas under enough pressure, it will turn into a liquid and when you release the pressure, the liquid will turn back into a gas. In the summer, the compressor increases the pressure and temperature of the refrigerant, turns it into a liquid, and sends it to a coil in your duct work. There, the pressure is decreased and the liquid returns to a gas, and the temperature decreases. The coil gets cold and a fan blows the cool air into your house while the refrigerant , which has absorbed heat from your house, returns to the compressor where it dissipates the heat from your house to the air outside via another coil. In the winter, the compressor turns the gas into a liquid, but now it sends it to the outside coil where it turns back into a gas and the temperature decreases. The refrigerant, which is now hot from absorbing heat from outdoors (yes, it really did!,) moves to the coil in your duct work and makes it hot. Your fan blows the warm air into your house.
A geothermal system removes the outside heat transfer coil and replaces it with a coil that is buried deep underground. The ground temperature below 4-5 feet remains relatively constant year round at around 55 degrees. This provides much more efficient heat transfer compared to an above ground coil exposed to constantly changing temperatures. There are some geothermal systems in which the outdoor coils are buried at shallower depths, but use a larger coil to compensate for the warmer ground temperatures. There are other systems that submerge the coil in a pond or an aquifer. Though more difficult to install, they are more efficient as water is such a good conductor of heat. A geothermal system can cut your heating bill 50%-60%, possibly more.
Geothermal misconceptions:
1. You must have duct work in your house for AC. Geothermal AC will not work with any other type of heating system. If you run cold water through baseboard heaters, radiators or radiant heat pipes, you will have condensation on your floors. This would cause wet, slippery floors and water damage to rooms. If you don't have duct work, you can use geothermal for heating only.
2. The heat that goes into your house comes from the compressor, not from the Earth's core. You would have to go down a great depth to reach that heat and if you did, it would be to hot to transfer heat to when you are using AC in the summer. I would also suspect that if you went too deep magma would actually melt the piping!
3. A geothermal system will drastically reduce your fuel cost for the winter, but prepare yourself for a whopper of an electric bill. The spike in your electric bill in the summer when you run your AC will pale in comparison to your winter electric bill. The compressor uses a lot of power and you will be running it all winter long. Do your homework as some compressors are more efficient than others.
Thursday, March 12, 2009
Hot Water Recirculation
When you run hot water from your faucet, how long does it take for the water to get, well, hot? If you said anything other than instantly, you could be wasting thousands of gallons of water each year. If you have a well, you are paying for electricity to pump it, paying to heat it, and possibly paying for salt to soften it. If you have municipal water, you are paying for the water, paying to heat it, and paying the sewer bill based on your water usage. Depending on how long you have to wait for hot water to reach the faucet, you are wasting 14,000 to 38,000 gallons of water each year, which means you have to heat the same amount of water to replace it. Water, energy and your hard-earned money down the drain, wasted.
A hot water recirculation system works off of an aquastat and/or a timer to keep hot water available at the faucet so none is wasted waiting for it to get hot. The timer is important to avoid recirculating at hours when people are sleeping or at work. There are two types of hot water recirculation systems, active and passive. An active system is generally installed during construction of a home. An aquastat activates the recirculation pump which returns the cooled-off water at the faucet back to the water heater through a separate recirculation pipe to be reheated thereby maintaining hot water at the faucet. This type of system is expensive to install and probably isn't feasible as a retrofit option.
A passive system uses the cold water piping as the recirculation pipe back to the water heater. One method uses a pump which mounts to your water heater and operates via a timer to recirculate the hot water at low volume through a thermostatic diverter valve mounted under the farthest sink. Though this method certainly saves water, it uses more energy because as the water cools off in the pipes it must again be reheated. Another method is to mount the recirculation pump under the farthest sink and have it operate via a thermostatic sensor. When it senses the water cooling off in the pipes, it turns on the pump and sends the cool water back to the water heater to be reheated. This saves more energy as it doesn't recirculate constantly like the water heater mounted pump, but still loses heat through the piping. Another method is to have a recirculation pump mounted under remote sinks which operates via a push button on the counter. When you want to use hot water, you activate the pump with the button. The water that would normally be allowed to run down the drain is returned back to the water heater. A sensor shuts off the pump when hot water arrives at the faucet. This is the most efficient method of hot water recirculation. You get bonus points for using a DC pump powered by a PV panel.
The cost of a passive recirculation system as about $300. The installation is not too difficult, but if you need a plumber to do it add another $200-$300. Depending on your water and energy costs and whether you install the system yourself or hire a plumber, your payback time should be one to three years. Sounds like another no brainer to me.
A hot water recirculation system works off of an aquastat and/or a timer to keep hot water available at the faucet so none is wasted waiting for it to get hot. The timer is important to avoid recirculating at hours when people are sleeping or at work. There are two types of hot water recirculation systems, active and passive. An active system is generally installed during construction of a home. An aquastat activates the recirculation pump which returns the cooled-off water at the faucet back to the water heater through a separate recirculation pipe to be reheated thereby maintaining hot water at the faucet. This type of system is expensive to install and probably isn't feasible as a retrofit option.
A passive system uses the cold water piping as the recirculation pipe back to the water heater. One method uses a pump which mounts to your water heater and operates via a timer to recirculate the hot water at low volume through a thermostatic diverter valve mounted under the farthest sink. Though this method certainly saves water, it uses more energy because as the water cools off in the pipes it must again be reheated. Another method is to mount the recirculation pump under the farthest sink and have it operate via a thermostatic sensor. When it senses the water cooling off in the pipes, it turns on the pump and sends the cool water back to the water heater to be reheated. This saves more energy as it doesn't recirculate constantly like the water heater mounted pump, but still loses heat through the piping. Another method is to have a recirculation pump mounted under remote sinks which operates via a push button on the counter. When you want to use hot water, you activate the pump with the button. The water that would normally be allowed to run down the drain is returned back to the water heater. A sensor shuts off the pump when hot water arrives at the faucet. This is the most efficient method of hot water recirculation. You get bonus points for using a DC pump powered by a PV panel.
The cost of a passive recirculation system as about $300. The installation is not too difficult, but if you need a plumber to do it add another $200-$300. Depending on your water and energy costs and whether you install the system yourself or hire a plumber, your payback time should be one to three years. Sounds like another no brainer to me.
Subscribe to:
Posts (Atom)